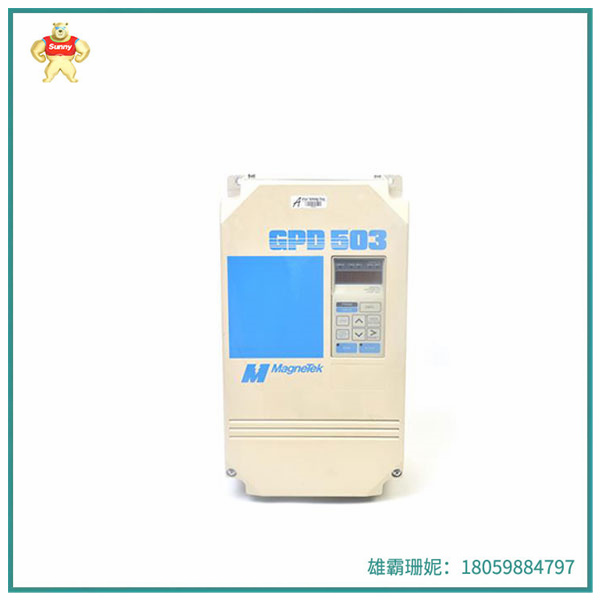
GPD-503-DS314是一种工业用数字万用表,由广州德力西电气设备有限公司生产。该产品采用3.5寸彩屏显示,支持多种单位测量,包括电压、电阻、电流、电容、频率等,同时具有校准功能和数据存储功能。GPD-503-DS314还支持蓝牙连接和打印输出,可广泛应用于各种工业和实验室环境。
GPD 503简化了启动程序
这个程序将很快得到你的数字操作员键盘或用户提供的远程操作员控制运行。它假设GPD 503和电机正确连接(参见1-8至1-15页),并且启动将在没有任何更改工厂设置常量的情况下执行。
关于该驱动器的许多其他特性的详细信息将在本手册的后面部分中找到。
安装
1. 确保您的输入电压源,电机和驱动器铭牌都标有230V,460V或575v。其他电压也可以使用,但需要额外的编程,参见第2节。
2. 安装驱动器的垂直表面上有足够的空气流通空间。
3.拆卸前盖板,将导管安装到底板上,连接电源线和地线
显示。
谨慎
请确保输入电源只连接L1、L2和L3端子,否则会造成严重损坏。仅将电机连接到T1、T2和T3端子。
键盘操作
1. 更换盖板并接通输入电源-键盘显示“F00.00”;驱动,前进,和
交通灯亮着。长按JOG键,注意电机旋转方向。如果是的话
不正确,取下电源,待“CHARGE”指示灯熄灭后,在T1、T2端子间切换接线。更换盖板,接通输入电源。
2. 运行、停止和频率(速度)——这里使用频率和速度这两个术语
互换。“F00.00”显示中的60.00 (Hz)值等于普通电机的全速(频率)。按RUN键;运行灯闪烁,停止灯闪烁(表示驱动器以零速度运行)。注意在“0”中闪烁“0”。0英寸的显示屏。按“向上箭头”键一次,将显示频率值增加到10.00。按DATA/ENTER键输入转速数据,注意电机轴开始转动。使用“向上箭头”,“向下箭头”和“右箭头”(RESET)键重复此过程以引入各种速度,注意驱动器只有在按下DATA/ENTER键后才能响应每个新值。“F00.00”显示指示驱动器正在查看的频率命令,无论它是否正在运行。
3.倒车-可以选择在停止时,或在运行时。驱动器停止后,按
FWD/REV键,并注意REV灯亮,FWD灯灭。如果按下此键时驱动器正在运行,则驱动器将电机减速到0 Hz,然后将电机加速到相反方向的相同速度。如果您的机器可以反向操作而不会损坏,您可以在运行时尝试此操作。
4. 显示-当驱动器停止时,每次按下DISPL(显示)键,就会出现不同的功能。上电后的第一个功能是上面讨论的* fo0.0 "显示。按下DISPL,出现“0.00”;这是一个输出频率(速度)的显示
被识别为唯一没有alpha字符的显示。下一个是*0。oA”;“A”表示该显示器为输出安培。有关其他显示信息,请参见第3节。
5. 故障-如果一个不可接受的操作条件,如代码Ou(过电压),Uu(不足)
电压),OC(过电流)等发生,驱动器将跳闸,电机将滑行到停止。将显示相应的故障代码。

Gdd-503-ds314 is an industrial digital multimeter, produced by Guangzhou Delixi Electrical Equipment Co., LTD. The product uses a 3.5-inch color display to support a variety of unit measurements, including voltage, resistance, current, capacitance, frequency, etc., and has calibration and data storage functions. The GPD-503-DS314 also supports Bluetooth connectivity and print-outs for a wide range of industrial and laboratory environments.
GPD 503 SIMPLIFIED START-UP PROCEDURE
This procedure will quickly get you up and running by Digital Operator keypad or user suppliedremote operator control. It assumes that the GPD 503 and motor are correctly wired (see pages1-8 thru 1-15), and start-up is to be performed without any changes to factory set constants.
Detailed information on the many other features of this drive will be found in later sections of thismanual.
INSTALLATION
1. Be certain your input voltage source, motor, and drive name plates are all marked either 230V,460V, or 575v. Other voltages can be used, but require additional programming, see Section2.
2. Mount drive on a vertical surface with adequate space for air circulation.
3. Remove front cover, fit conduit to bottom plate, and connect power and ground wires as
shown.
CAUTION
Be certain you connect input power to terminals L1, L2, and L3 only, or serious damagewill result. Connect motor to terminals T1, T2, and T3 only.
KEYPAD OPERATION
1. Replace cover and apply input power - keypad display shows "F00.00 "; DRIVE, FWD, and
STOP lamps are on. Press and hold JOG key, noting direction of motor rotation. If it is
incorrect, remove power, wait for "CHARGE" light to go out, then switch wires betweenterminals T1, and T2. Replace cover, and apply input power.
2. Run, Stop, and Frequency (Speed)- Here, the terms frequency and speed are used
interchangeably. A value of 60.00 (Hz) in the "F00.00" display equals full speed (frequency)for common motors.Press RUN key; RUN lamp lights, STOP lamp flashes (to indicate drive isrunning at zero speed). Note flashing "0" in "Fo0. oo " display. Press "up arrow" key one timeto increase display frequency value to 10.00. Press DATA/ENTER key to enter speed data,noting that motor shaft begins to turn. Repeat this procedure using "up arrow", "down arrow"and "right arrow”(RESET) keys to introduce various speeds, noting that the drive responds toeach new value only after the DATA/ENTER key is pressed. The "F00.00 "display indicatesthe frequency command the drive is looking at, whether it is running or not.
3. Reversing - can be selected while stopped, or while running. With the drive stopped, press
FWD/REV key and note the REV lamp lights and FWD lamp goes out. If drive is runningwhen this key is pressed, the drive will decelerate the motor to 0 Hz, then accelerate themotor to the same speed in the opposite direction. You can try this while running, providedyour machine can be operated in reverse direction without damage.
4. Displays - With drive stopped, each time the DISPL (display) key is pressed, a differentfunction appears. The first function on power up is the *Fo0.0o "display, discussed above. Press DISPL and "0.00 "appears; this is a display of output frequency (speed) and is
recognized as the only display without alpha characters. The next is *0. oA "; the "A" indicatesthis display is output amps. For other display information, refer to Section 3.
5. Faults - If an unacceptable operating condition such as code Ou (over voltage),Uu (under
voltage), OC (over current), etc. occurs, the drive will trip, and the motor will coast to a stop. The appropriate fault code will be displayed.

| ABB | HENF452750R1 | ABB | 3BUS208800-001 |
| ABB | E3EP | HONEYWELL | FC-SDO-0824 V1.3 |
| ABB | HENF315276R1 | EL AU | C200/10/1/1/100 |
| ABB | E3ES | VIBRO-METER | 200-510-076-114 200-510-111-034 VM600 MPC4 |
| ABB | E5EAA | ICS TRIPL EX | T8431 |
| ABB | HENF105240R1 | SCANL AB | INTELLISCANDE I14-532NM SCANL AB |
| ABB | G3EA | KONGSBERG | RMP201-8 |
| ABB | HENF315754R1 | ABB | MB5103BSE002540R1 |
| ABB | G3EB | ABB | DAPI100 3AST000929R109 |
Copyright © 2022-2024 厦门雄霸电子商务有限公司 版权所有 备案号:闽ICP备14012685号-33